Setting Up A New Client
Download The Step-By-Step GuideYou have two options when it comes to getting your clients set up. You can either send them to the sales page you have available to you inside of Social Rotation or you can use your own payment platform and send them to the setup page once they have paid.
Let’s go through each option.
Option 1: Use Your Social Rotation Sales Page
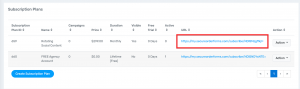
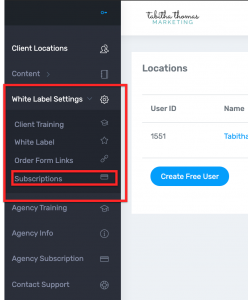
Click on White Label Settings and then click on Subscriptions.

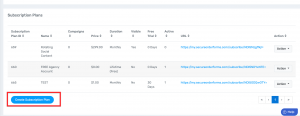
Then you will copy the URL of the paying subscription we set up earlier. This is the link you will send to your clients when they are ready to pay.
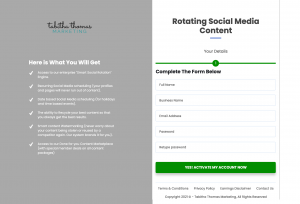
Your client will then fill out the information on the first page to create their account within your Social Rotation reseller account.
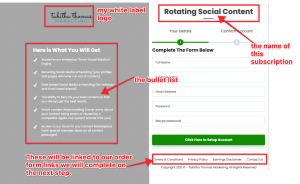
They will then click on Click Here to Setup an Account and it will take them to the next page to add in their payment information.
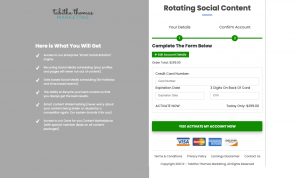
Once they have made the payment they will be directed to their login page to get into the system.
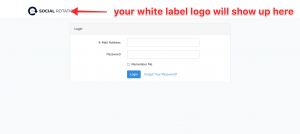
They will receive an email which will take them to their Social Rotation account.

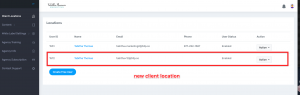
You will see this new client under your Locations.
Option 2: Use your Own Payment Platform
From here you have two options. You can either add the client yourself, or you can have your client fill out a form to create their account.
Add The Client Yourself
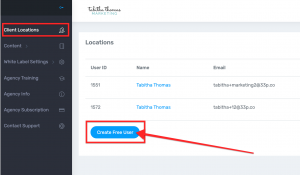
Click on Client Locations and then click on the Create Free User button.
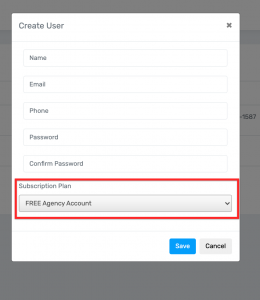
Fill in the information for your client. You can choose to give them the login details or not. Make sure to choose a free account and click Save. Your client’s account will then show under your Locations.
Have Your Client Fill In A Form
Click on White Label Settings and then Subscriptions.
Click on the Create Subscription Plan Button.
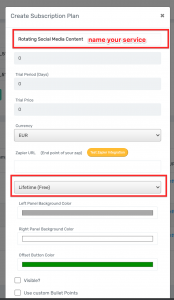
Add what you will call this service then choose lifetime free instead of monthly and then hit save.
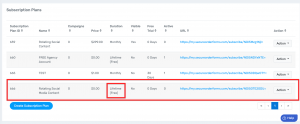
Then copy the URL of the one you just created (look for the lifetime free). Give your client this URL once they have paid for the services through your platform.
Your client will be directed to this page to create their account. Once they have filled this out they will then show in your Locations.